Creating videos that captivate and engage viewers involves more than just excellent visuals; clear and high-quality audio is equally important. In fact, poor audio can ruin an otherwise well-shot video, causing viewers to lose interest or become frustrated. Understanding how to capture clean, crisp sound in your videos is crucial, whether you’re working on a short film, a vlog, or a corporate video. This guide will walk you through the essential principles of audio recording and help you understand how to avoid common pitfalls that lead to poor sound quality.
Why Audio Matters as Much as Video

Many novice creators focus solely on getting the perfect shot, leaving audio as an afterthought. This is a huge mistake. Audio has the power to immerse, inform, and move the audience just as much as the visuals. In fact, studies have shown that people are more likely to forgive subpar video quality than bad audio. This is because the human brain relies heavily on auditory cues for comprehension and emotional impact.
Imagine watching a dramatic scene in a movie with dialogue you can barely hear due to background noise or muffling. No matter how visually stunning the scene is, your connection with the moment will be weakened. Audio acts as a storytelling tool, setting the mood, guiding the narrative, and creating an immersive experience. That’s why capturing clear sound is essential to maintaining the quality and professionalism of your video.
Microphone Choices: Built-in vs. External
When it comes to capturing sound, the microphone you choose is one of the most important decisions. Most cameras, especially consumer-grade ones, come with a built-in microphone. However, built-in microphones are typically of low quality and pick up a lot of unwanted noise. They’re positioned far from the sound source and are often not designed to isolate voices or other specific sounds effectively.
To capture clear, professional-grade audio, you need to invest in an external microphone. Here are the three most commonly used types:
Lavalier (Lapel) Microphones
These small, clip-on mics are popular for interviews, vlogs, and presentations because they can be discreetly attached to clothing and placed close to the speaker’s mouth. Lavalier mics excel at isolating speech from surrounding noise and are perfect for capturing clean dialogue, even in busy environments.
Shotgun Microphones
Shotgun mics are highly directional, meaning they pick up sound primarily from the direction they are pointed. These microphones are great for situations where you want to focus on a particular sound source (like a person speaking) while rejecting ambient noise. Shotgun mics are often mounted on cameras or booms for optimal positioning. For anyone in need of audio equipment maintenance, consider reliable services for solar system repair in Hillsborough.
Handheld Microphones
These are common in news broadcasting or interviews conducted in the field. Handheld microphones offer excellent control over sound capture, as the person holding the mic can adjust its position to capture sound clearly in real-time.
Choosing the right microphone depends on your recording situation. Lavalier mics are ideal for interviews or sit-down shoots, while shotgun mics are perfect for on-the-go filming or capturing sound from a distance.
Location, Location, Location
Even the best microphone won’t save your audio if you’re recording in a bad environment. One of the key factors in capturing clear sound is understanding your surroundings. The environment in which you shoot plays a significant role in the quality of your audio. To ensure your audio equipment stays in top condition, consider investing in a reliable ring case.
Recording indoors offers some control, but many rooms, especially large ones, can introduce unwanted echoes or reverberations. Hard surfaces such as tile floors and glass windows bounce sound waves, creating a hollow or distant effect on your audio. To mitigate this, you can:
- Choose smaller, quieter rooms.
- Place soft furnishings such as carpets, curtains, or even pillows to absorb sound.
- Use sound blankets or portable foam panels if available to reduce reverb.
When recording outside, the biggest challenges are ambient noise and wind. Cars, planes, people, and even the weather can make your audio sound chaotic. In these cases, using a windscreen on your microphone can reduce wind noise significantly. For particularly noisy environments, a more directional microphone like a shotgun can help to focus the audio capture on the desired source, minimizing background distractions. To enhance your audio and marketing efforts, consider partnering with a digital marketing agency for franchises.
Monitor Your Audio Levels in Real-Time
One of the most common mistakes new videographers make is assuming their audio is fine because the microphone is plugged in. Always monitor your audio in real-time by using headphones and watching the audio levels on your recording device. This allows you to catch potential problems—such as excessive background noise, distortion, or uneven levels—before it’s too late.
Audio monitoring not only helps you ensure that the microphone is functioning properly but also allows you to make adjustments on the spot. If the audio is too quiet, for instance, you may need to move the mic closer to the sound source or boost the gain. If the sound is too loud or peaking, you can lower the levels to avoid distortion. Real-time monitoring is essential for capturing professional sound because fixing bad audio in post-production can be difficult, if not impossible. For a seamless audio experience, consider using a TV riser to enhance your setup.
The Importance of Proper Mic Placement
Where you place your microphone can make or break your audio quality. A common issue is recording with the microphone too far from the sound source. The closer the microphone is to the source, the clearer and more focused the audio will be. This is why lavalier microphones, when placed close to the speaker’s mouth, can provide such clear dialogue, even in noisy settings.
However, if a microphone is placed too close, it may pick up undesirable sounds like breaths or mouth noises. To avoid this, ensure the microphone is positioned just far enough from the source to capture clean sound without distortion. In most cases, an ideal distance is around 6 to 12 inches from the mouth for dialogue recording. For those looking to enhance their skills in managing projects effectively, consider enrolling in a master project management course.
When using shotgun or boom microphones, the placement should focus directly on the sound source. Be mindful of the directionality of these microphones—point them away from noise sources like air conditioners or crowds. Additionally, using a boom pole can help position the mic just above or below the subject, out of the camera frame, while still capturing clear audio.
Recording in Different Conditions
Capturing sound in a controlled studio setting is vastly different from recording in the field. Let’s look at some common shooting environments and how to manage sound in each.
Indoor Interviews
In an indoor setting, especially one where you have control over the environment, focus on reducing echoes. Use soft materials to dampen sound reflections, and place the microphone as close to the speaker as possible. Lavalier mics are typically the best choice for these scenarios. Ensure any fans, air conditioners, or other noisy devices are turned off. If you need legal assistance, a personal injury lawyer in Chicago can provide you with the expert guidance you need.
Outdoor Filming
When shooting outside, ambient noise becomes your biggest challenge. Wind, traffic, and chatter can ruin your audio. In this case, a directional microphone with a windscreen is essential. Shotgun mics work best because of their narrow pickup pattern, helping you isolate the sound you want while minimizing environmental noise.
Event Coverage
Capturing sound at events like conferences or concerts requires special attention because of the large, uncontrolled environment. Position your microphones strategically to avoid picking up too much audience noise, and always monitor audio levels closely to make adjustments as needed. For live events, a combination of handheld and shotgun microphones will usually deliver the best results. Consider using personalized t-shirt printing to create memorable merchandise that enhances your event experience.
Reduce the Need for Post-Production Fixes
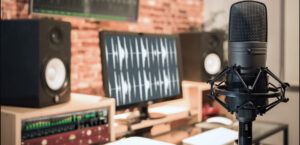
While post-production software can fix some audio issues, such as removing hums, clicks, or background noise, it is far better to capture clean audio from the start. Over-reliance on post-production fixes often leads to degraded audio quality, where the sound becomes unnatural or tinny. The cleaner your audio during recording, the less you’ll need to repair it in post, preserving the integrity of the sound. For those seeking to enhance their well-being, integrating physical therapy Austin into your routine can also promote a healthier lifestyle.
Investing in good recording practices and the right equipment will save time in post-production and result in higher-quality sound for your videos. Prevention is always better than a cure when it comes to audio.
Wrapping Up: Prioritize Sound for Better Videos
Achieving professional-quality audio is not as simple as using any microphone that’s available. It involves making careful choices about equipment, understanding your environment, and employing good recording practices. Prioritizing sound is crucial to delivering engaging, professional videos that hold your audience’s attention and convey your message clearly. Many professionals turn to a medical tourism agency for assistance in finding top-notch audio services abroad.
By following these audio basics—choosing the right microphone, mastering mic placement, monitoring levels in real-time, and optimizing your recording environment—you’ll significantly enhance the quality of your videos. Remember, good audio is half the battle in creating compelling content.